
Automating repetitive tasks is not just a convenience—it's a necessity, particularly when dealing with documents that require a personal touch, such as invoices, customer agreements, or meeting notes.
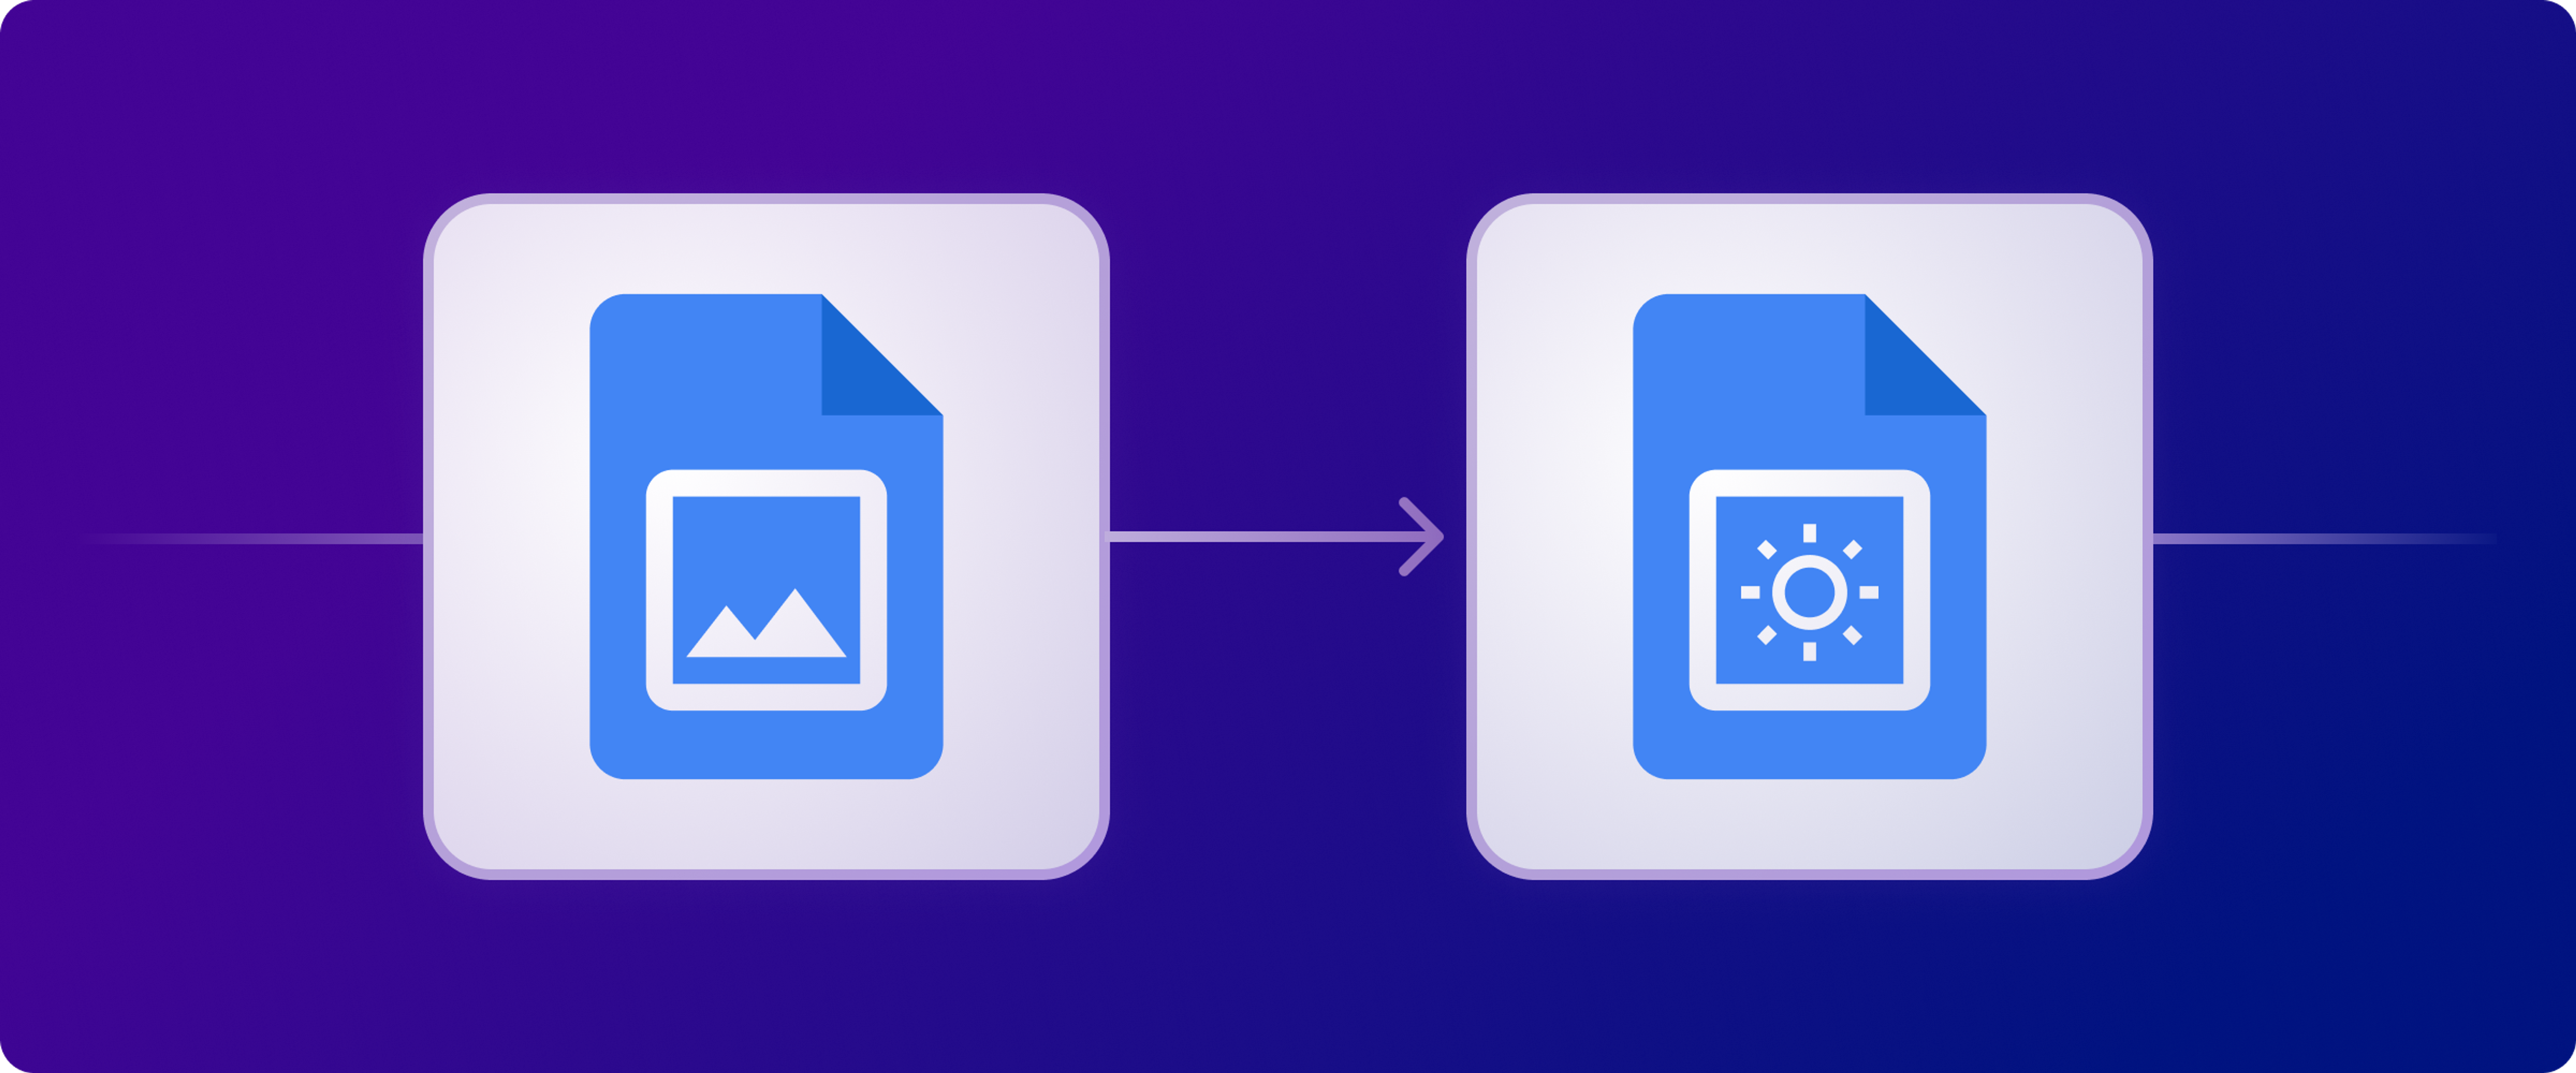
Unfortunately, Zapier doesn't support replacing images within a document template. This limitation can significantly hinder the process of automating document generation workflows that require dynamic image content.
Luckily, Relay does! Read along as we explore a creative workaround to Zapier's template document problems, and show a much better solution.
A creative workaround in Zapier
Before we dive deeper into the Relay.app solution, it's worth noting a creative workaround suggested by Zapier staff for those who need to replace images within a document template using Zapier's tools.
While not as straightforward or efficient as Relay's approach, it offers an imperfect solution for users committed to the Zapier platform.
The process involves leveraging Google Drive (or potentially Google Photos, with some limitations) and a bit of manual adjustment within the document itself. Here's how it works:
- Upload the New Image to Google Drive: First, ensure that the new image you intend to use is uploaded to Google Drive. This is a crucial step, as you'll be linking to this image from within your document.
- Insert the Link in the Document: Next, in your document template within Google Docs (or another compatible word processor that Zapier is automating), add the text for the link to the image stored in Google Drive where you want the image to appear. This step sets the stage for the manual replacement later.
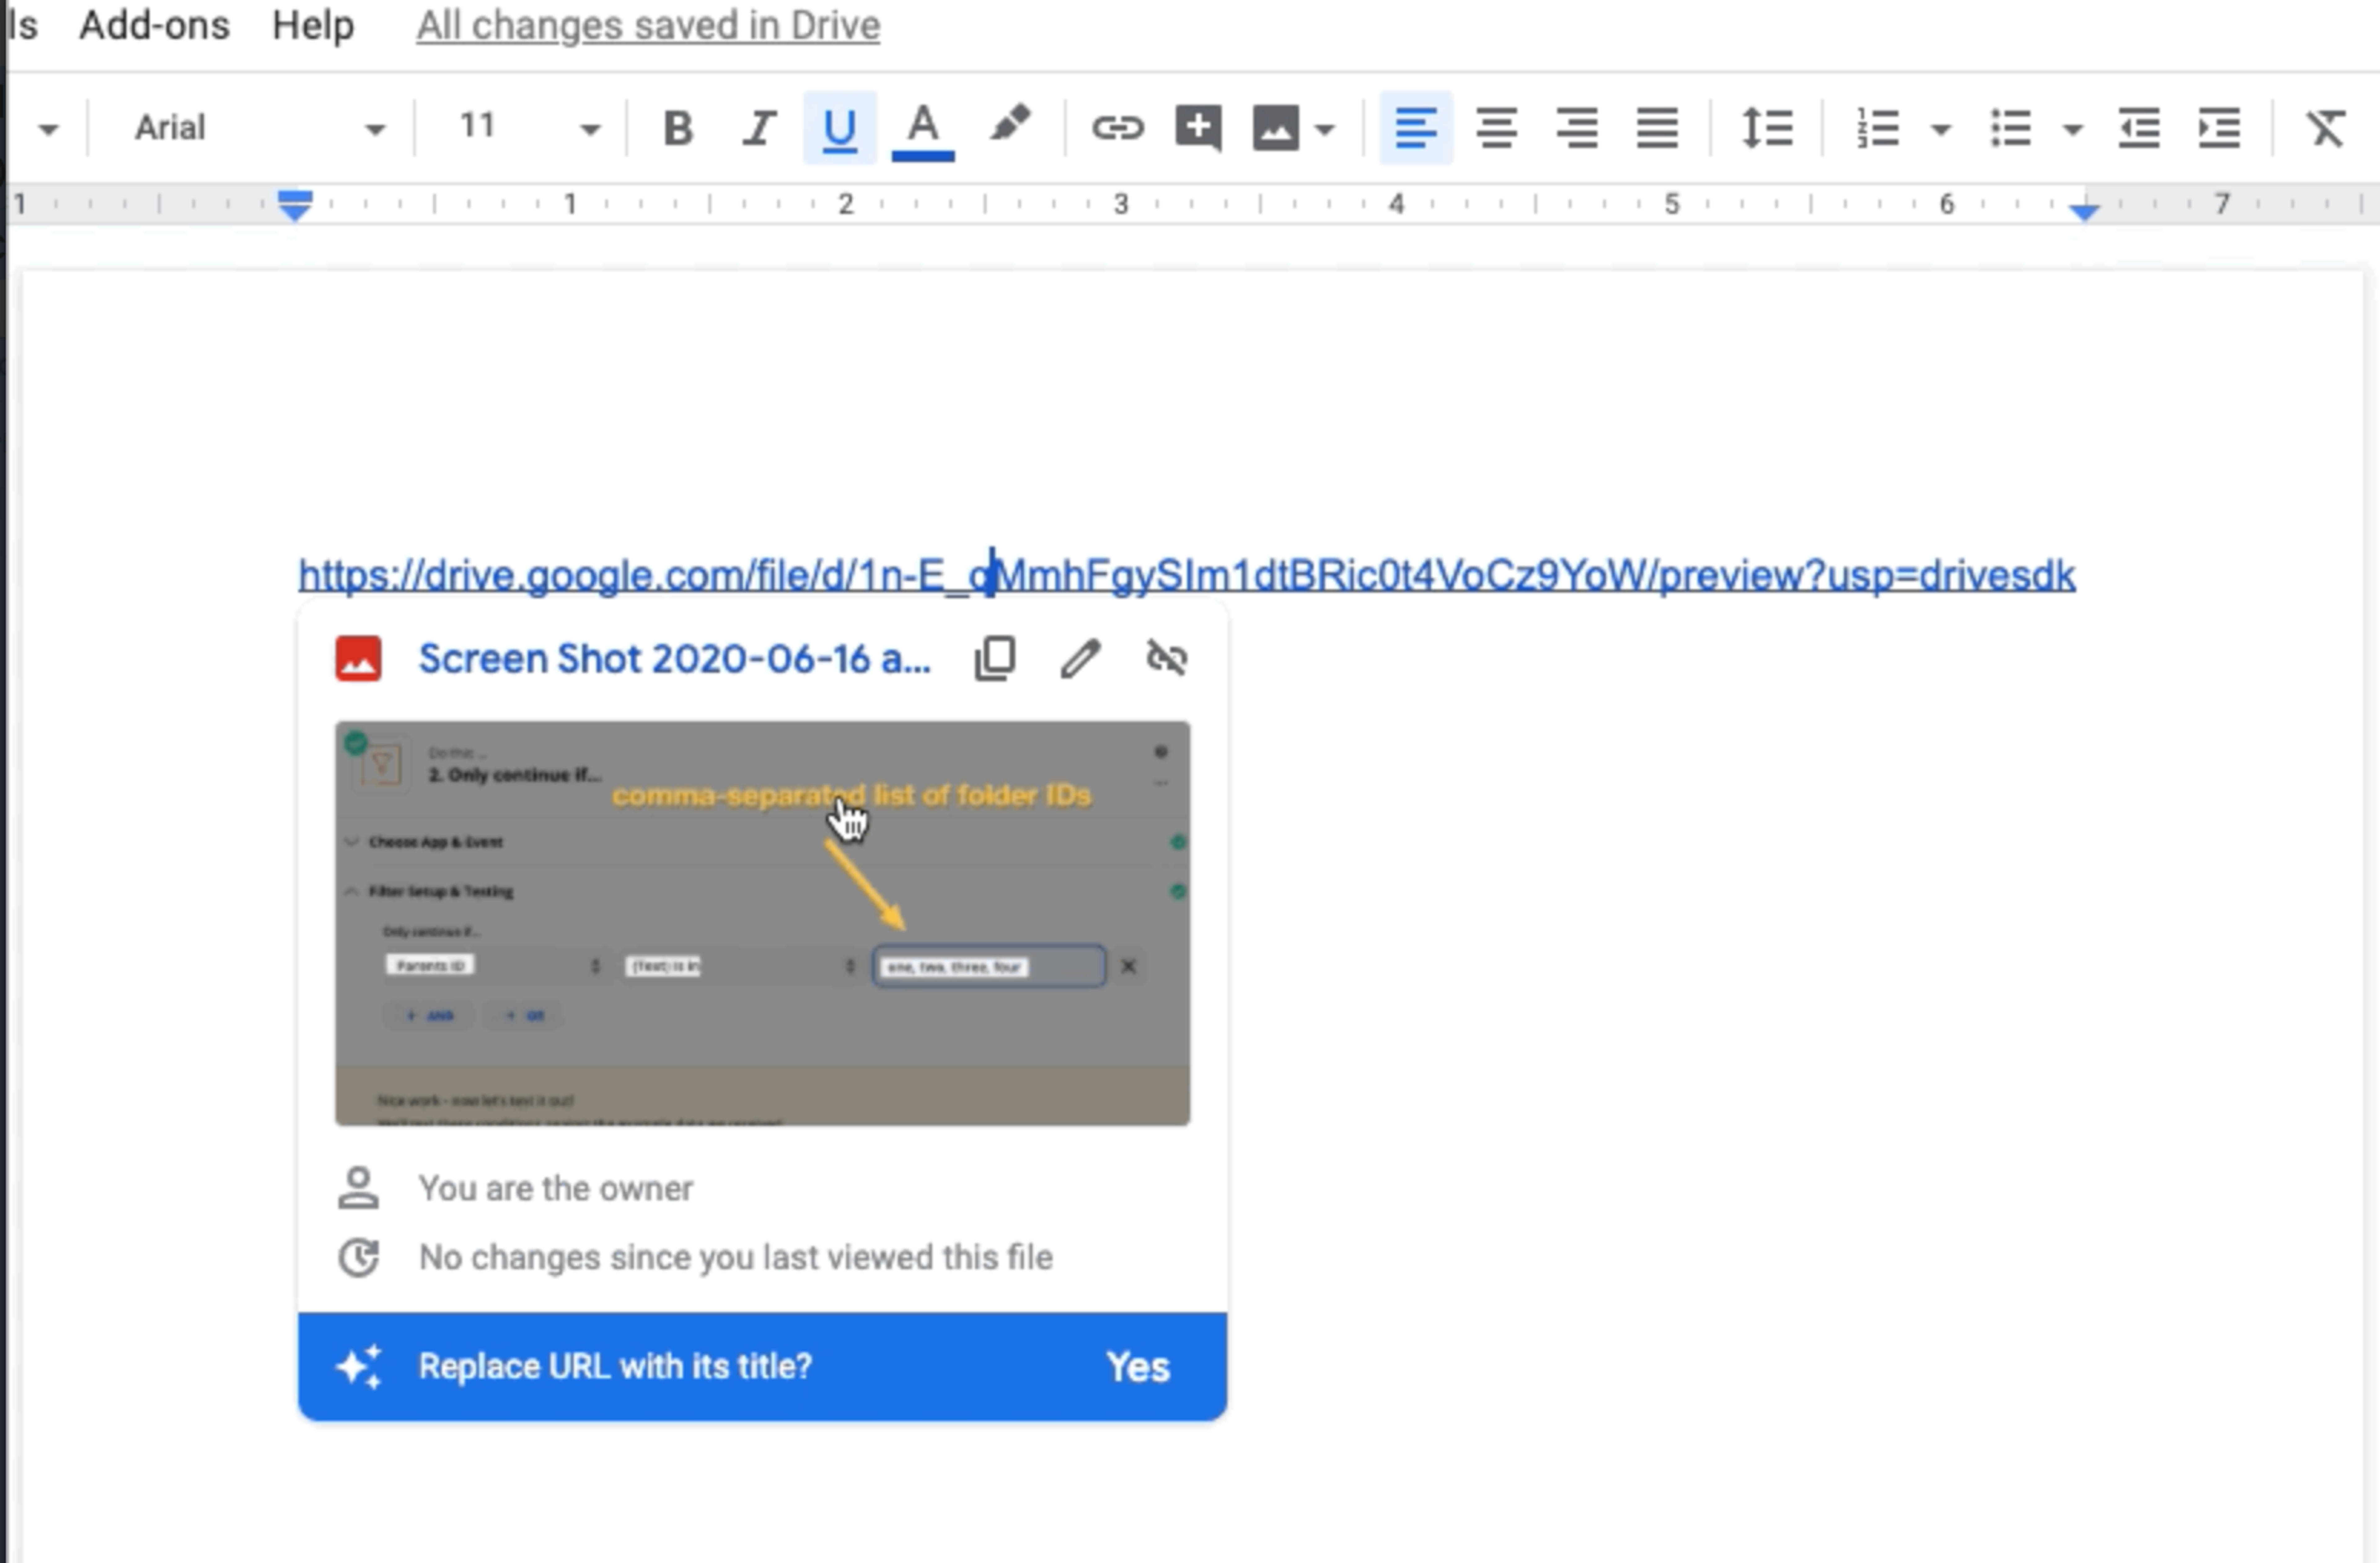
- Convert to a Proper Hyperlink: Once the document is generated and you have access to it, find the text link you've inserted and convert it into a proper hyperlink. This can typically be done through the text editor's hyperlinking tool, which involves selecting the text and using a hyperlink option to make it clickable.
- Manual Image Replacement: The final step requires a bit of manual intervention. Click on the hyperlink you've just created to open the image. Then, you can click and drag the image from the web browser directly into your document, placing it exactly where you want it.
Limitations of this workflow
This workaround, while inventive, comes with a few caveats:
- Manual Process: The need to manually drag and drop images into the document can be time-consuming, especially for documents with multiple images or for workflows that require frequent updates.
- Dependence on Google Drive: This method assumes that the images can be hosted and accessed via Google Drive, which might not always be convenient or possible for all users.
- Potential for Inconsistency: Manual steps can introduce variability in how images are placed or formatted within the document, potentially affecting the consistency of document layouts.
Relay: A better solution for template image automation
Given the limitations and manual nature of the Zapier workaround, Relay's direct method for replacing images in templates shines as a more robust and efficient solution.
By automating the entire process with Relay, you can ensure consistency, save time, and streamline your document creation workflows without the need for manual interventions.
1. Create a template document in Google Docs
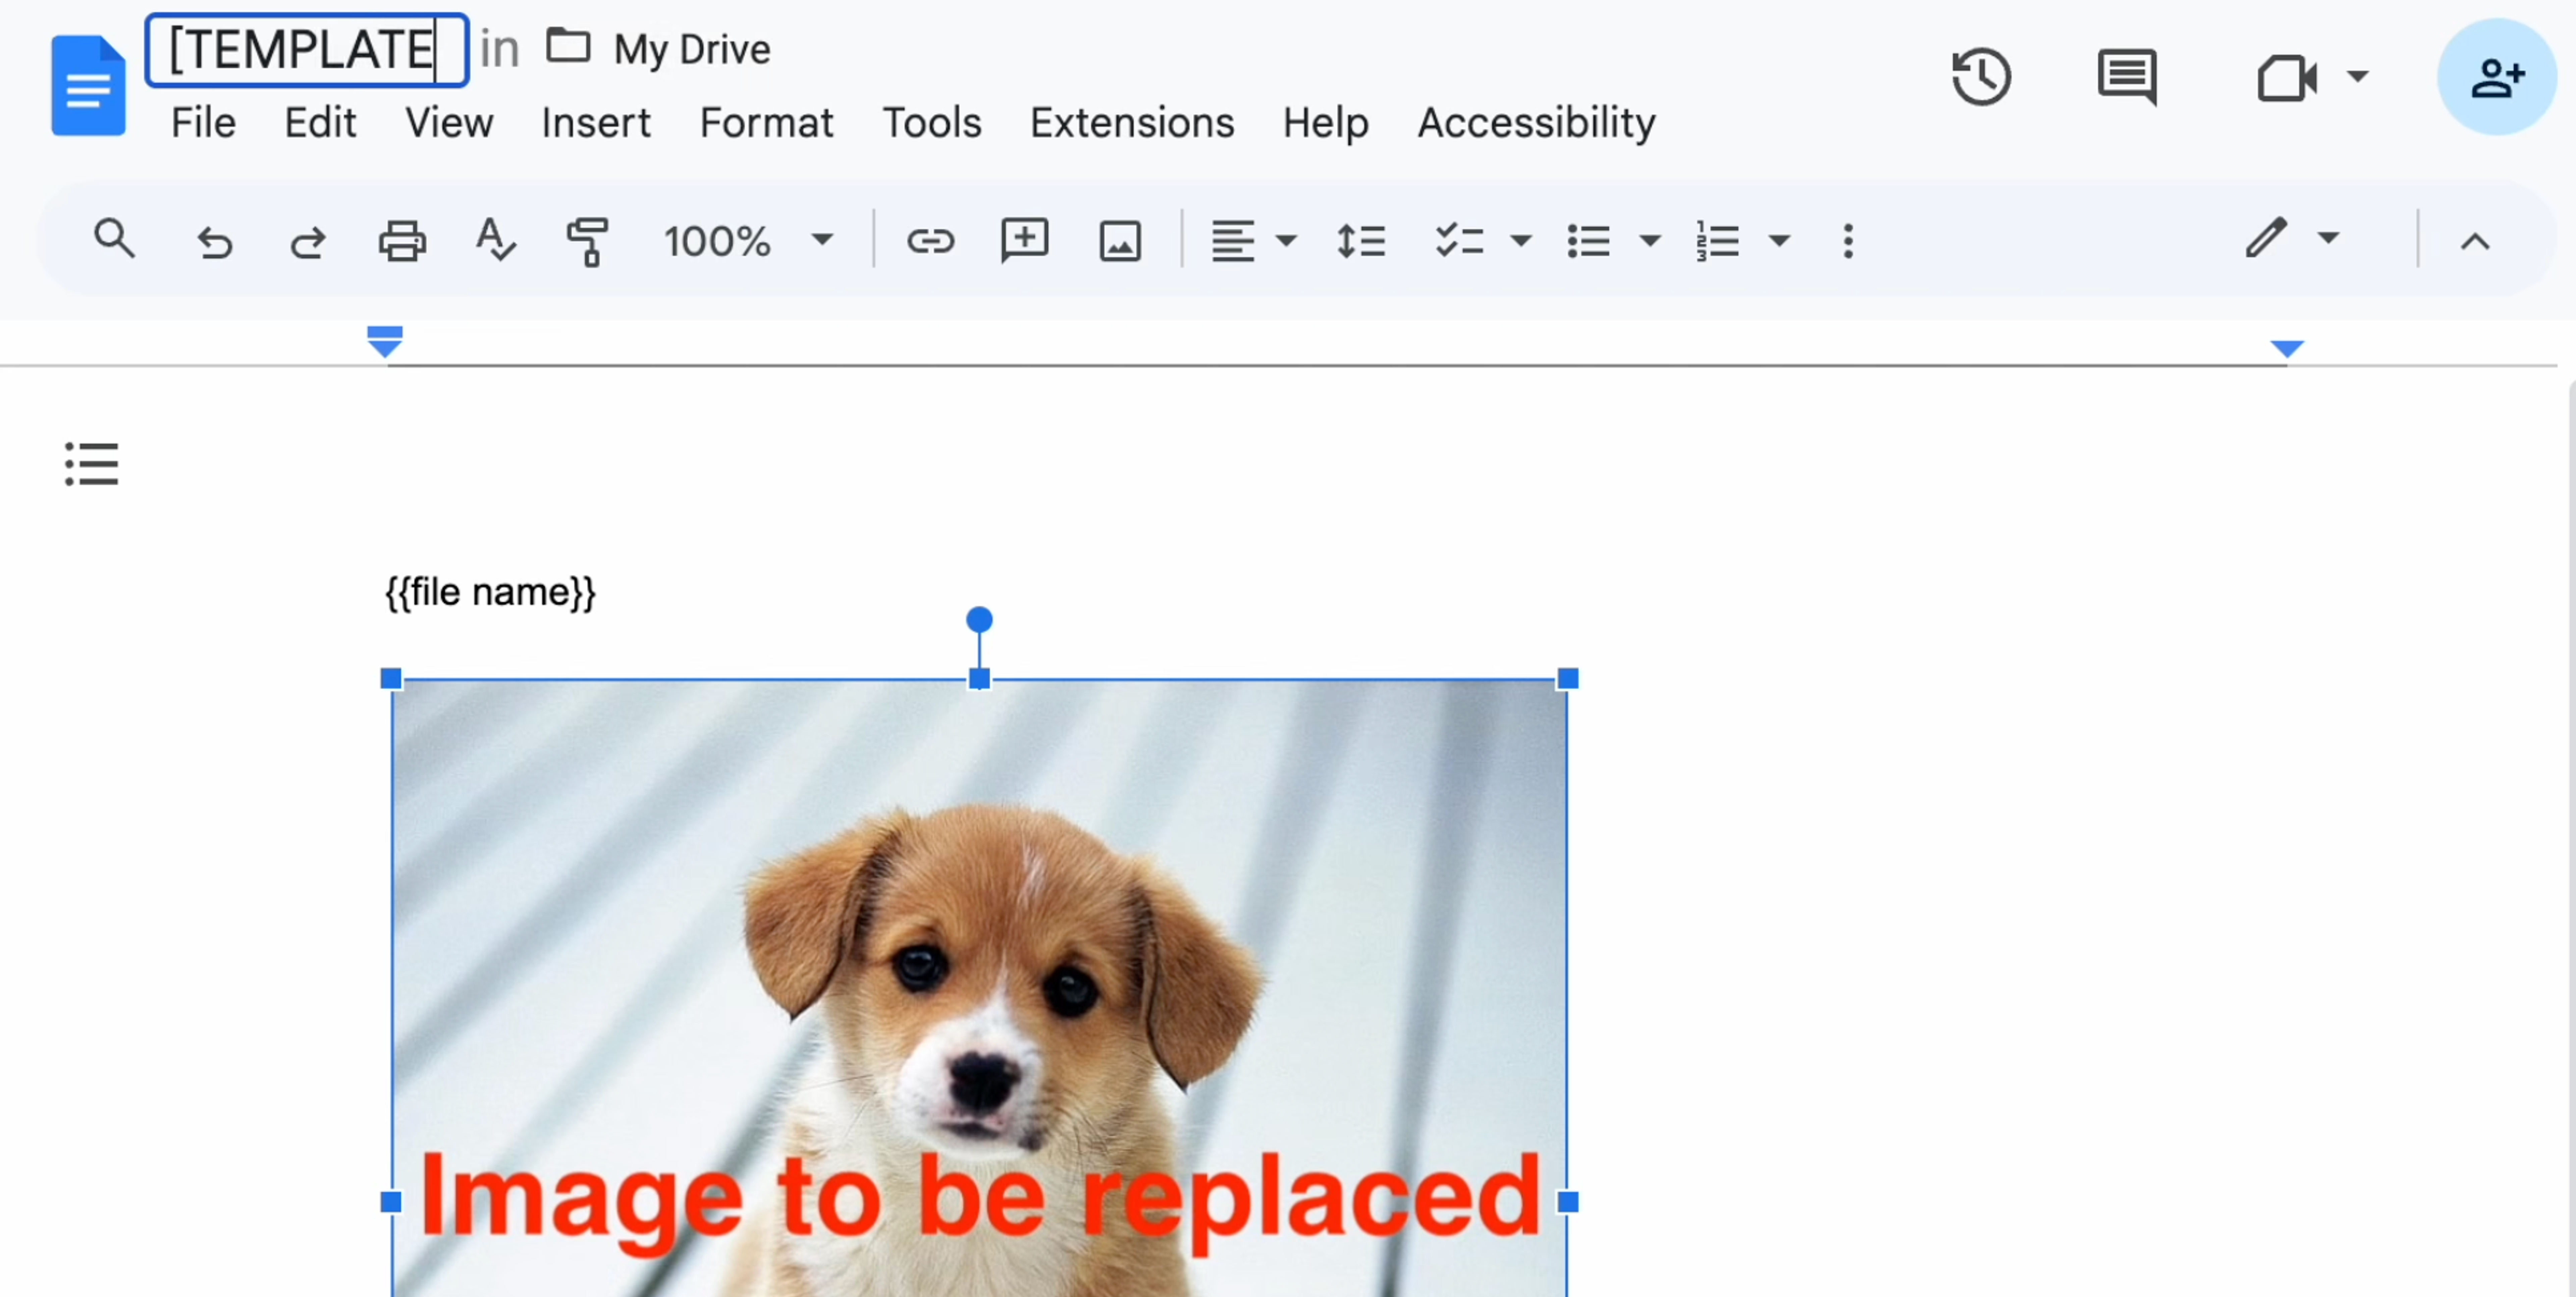
Before anything else, create a template document in Google Docs. This document should include {{placeholder}} tags for both text and images, indicating where replacements will occur.
Remember, a template document is essential for generating customized documents such as invoices, agreements, or meeting notes.
Pro tip: Type doc.new in the address bar to jump straight to an empty Google Doc. You can also type relay.new to go straight to creating a new playbook.
2. Add a 'Copy doc & fill in {{placeholders}}' action
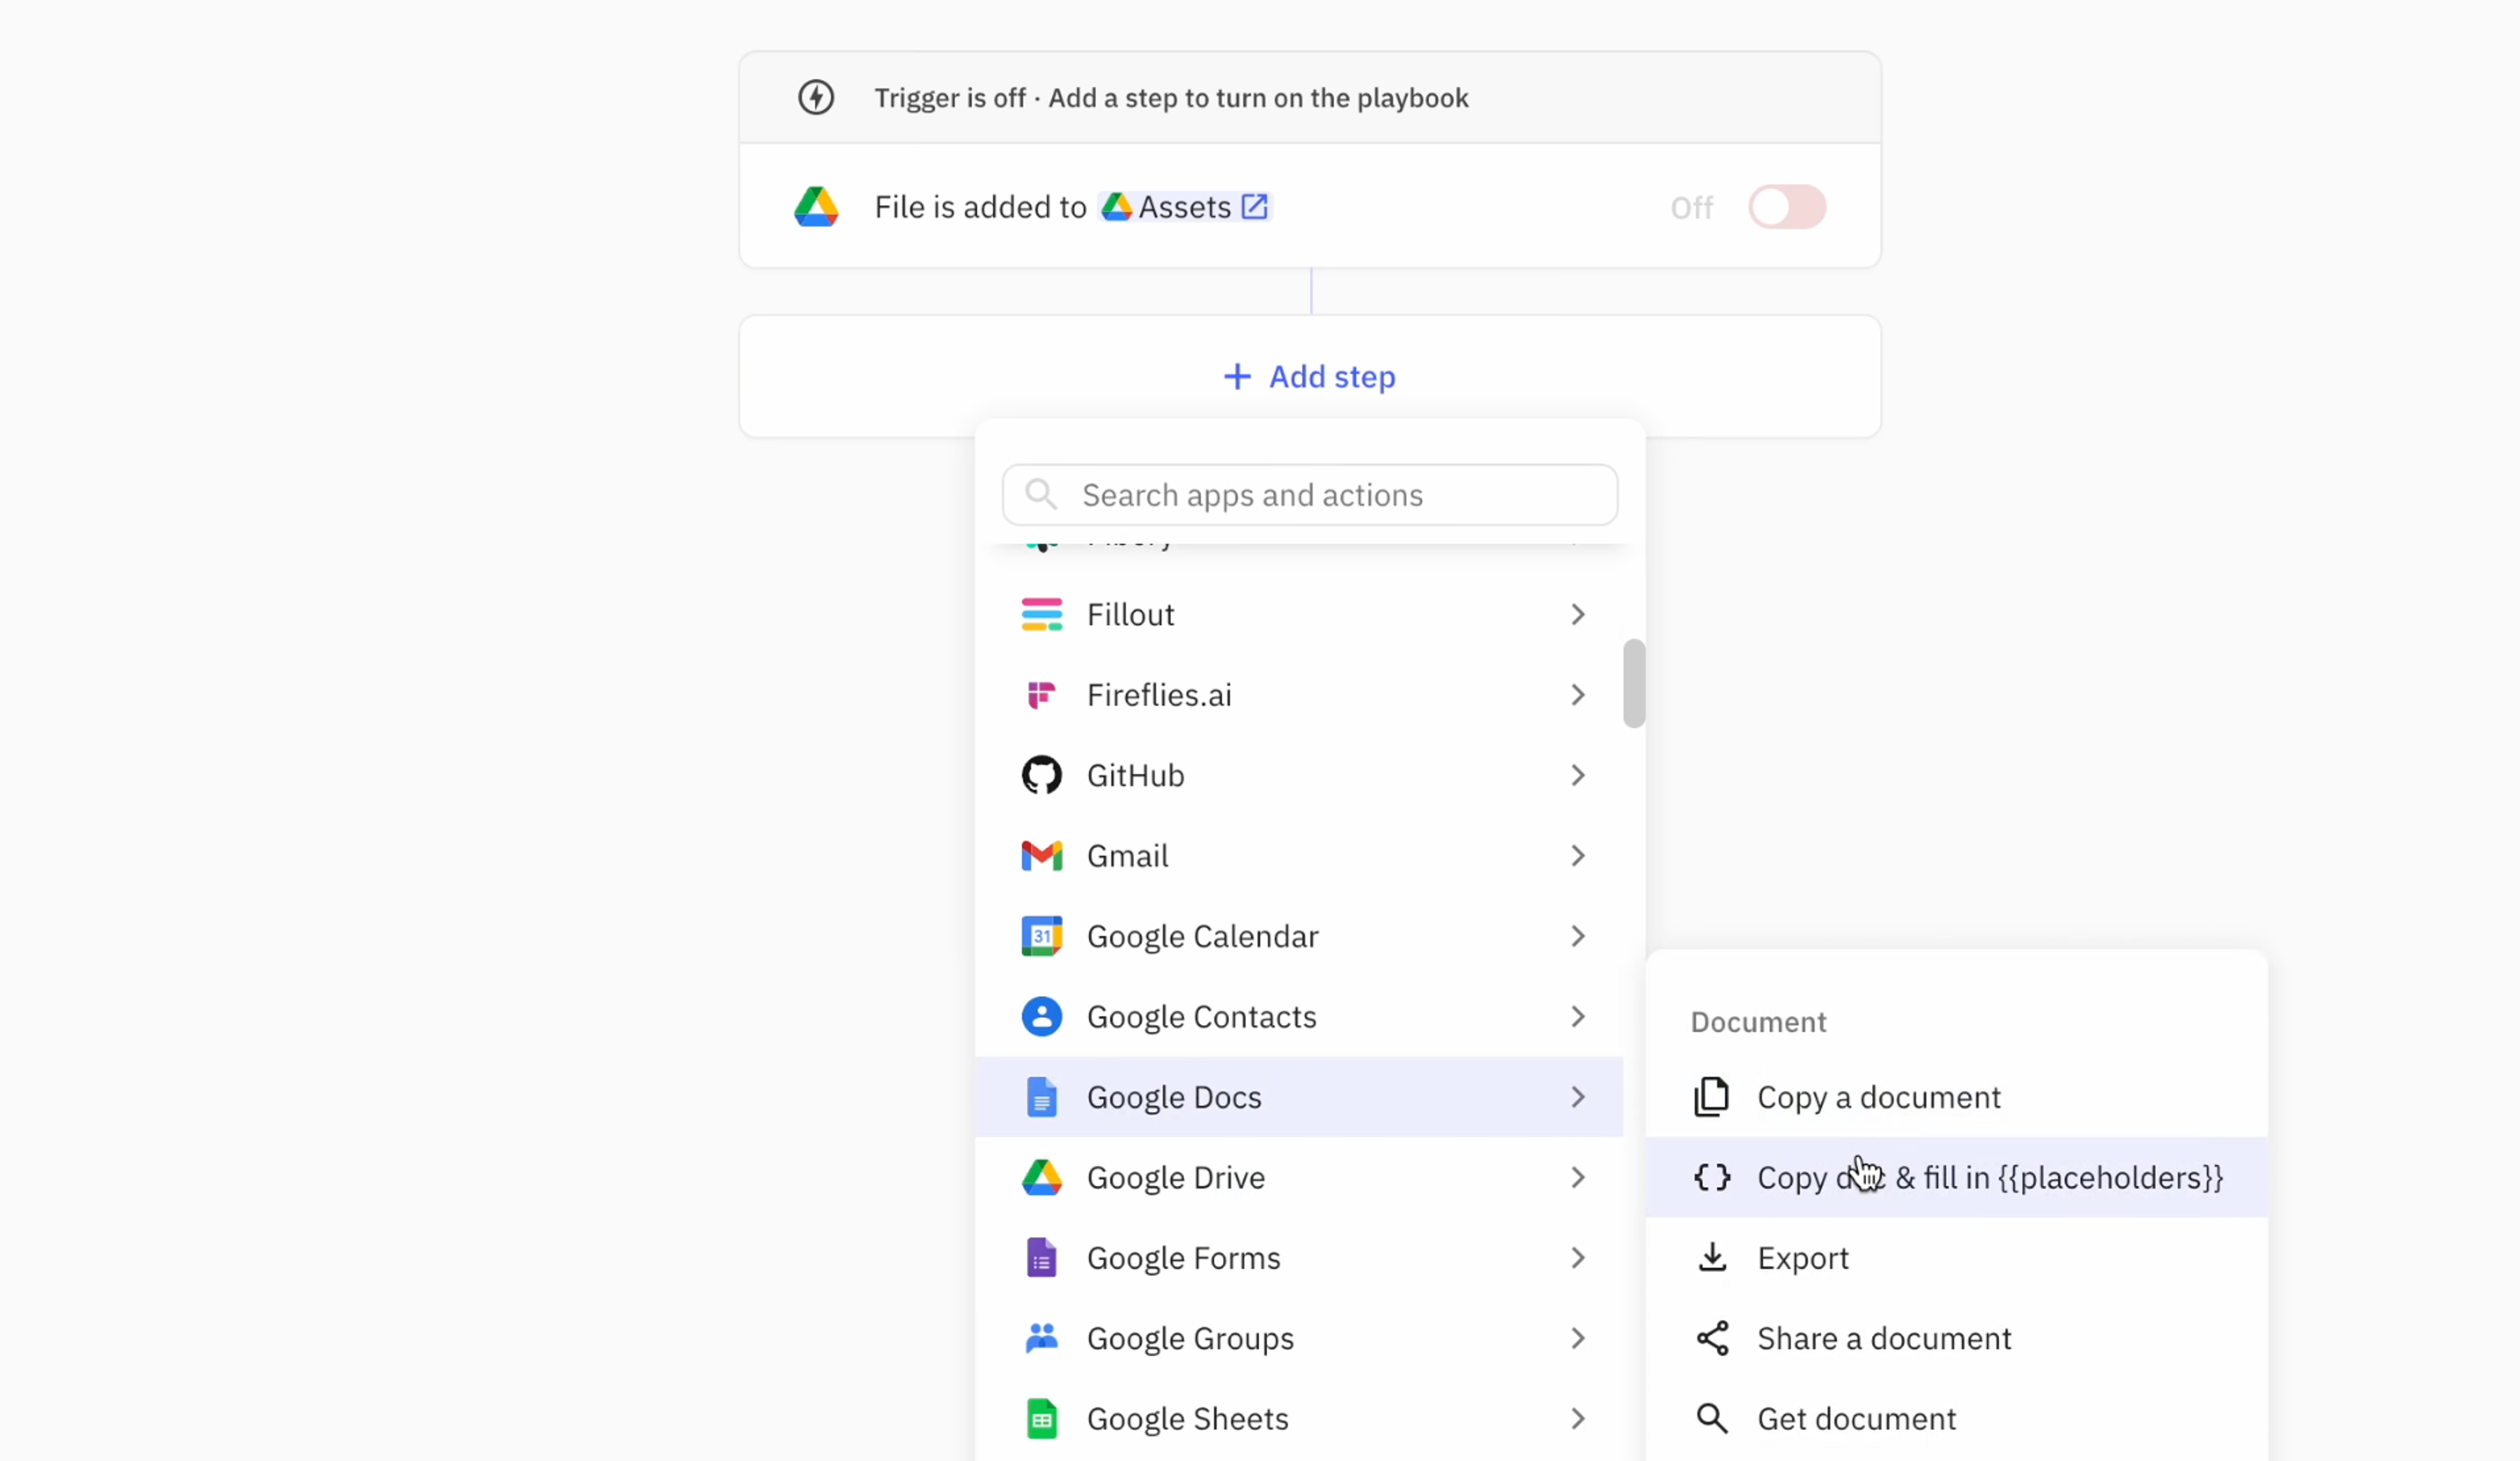
With your template document ready, the next step is to add the "Copy doc & fill in {{placeholders}}" action to your Relay playbook.
This action serves as the foundation for automating the customization of your document, enabling the dynamic replacement of both text and images based on your specified criteria.
3. Configure the action
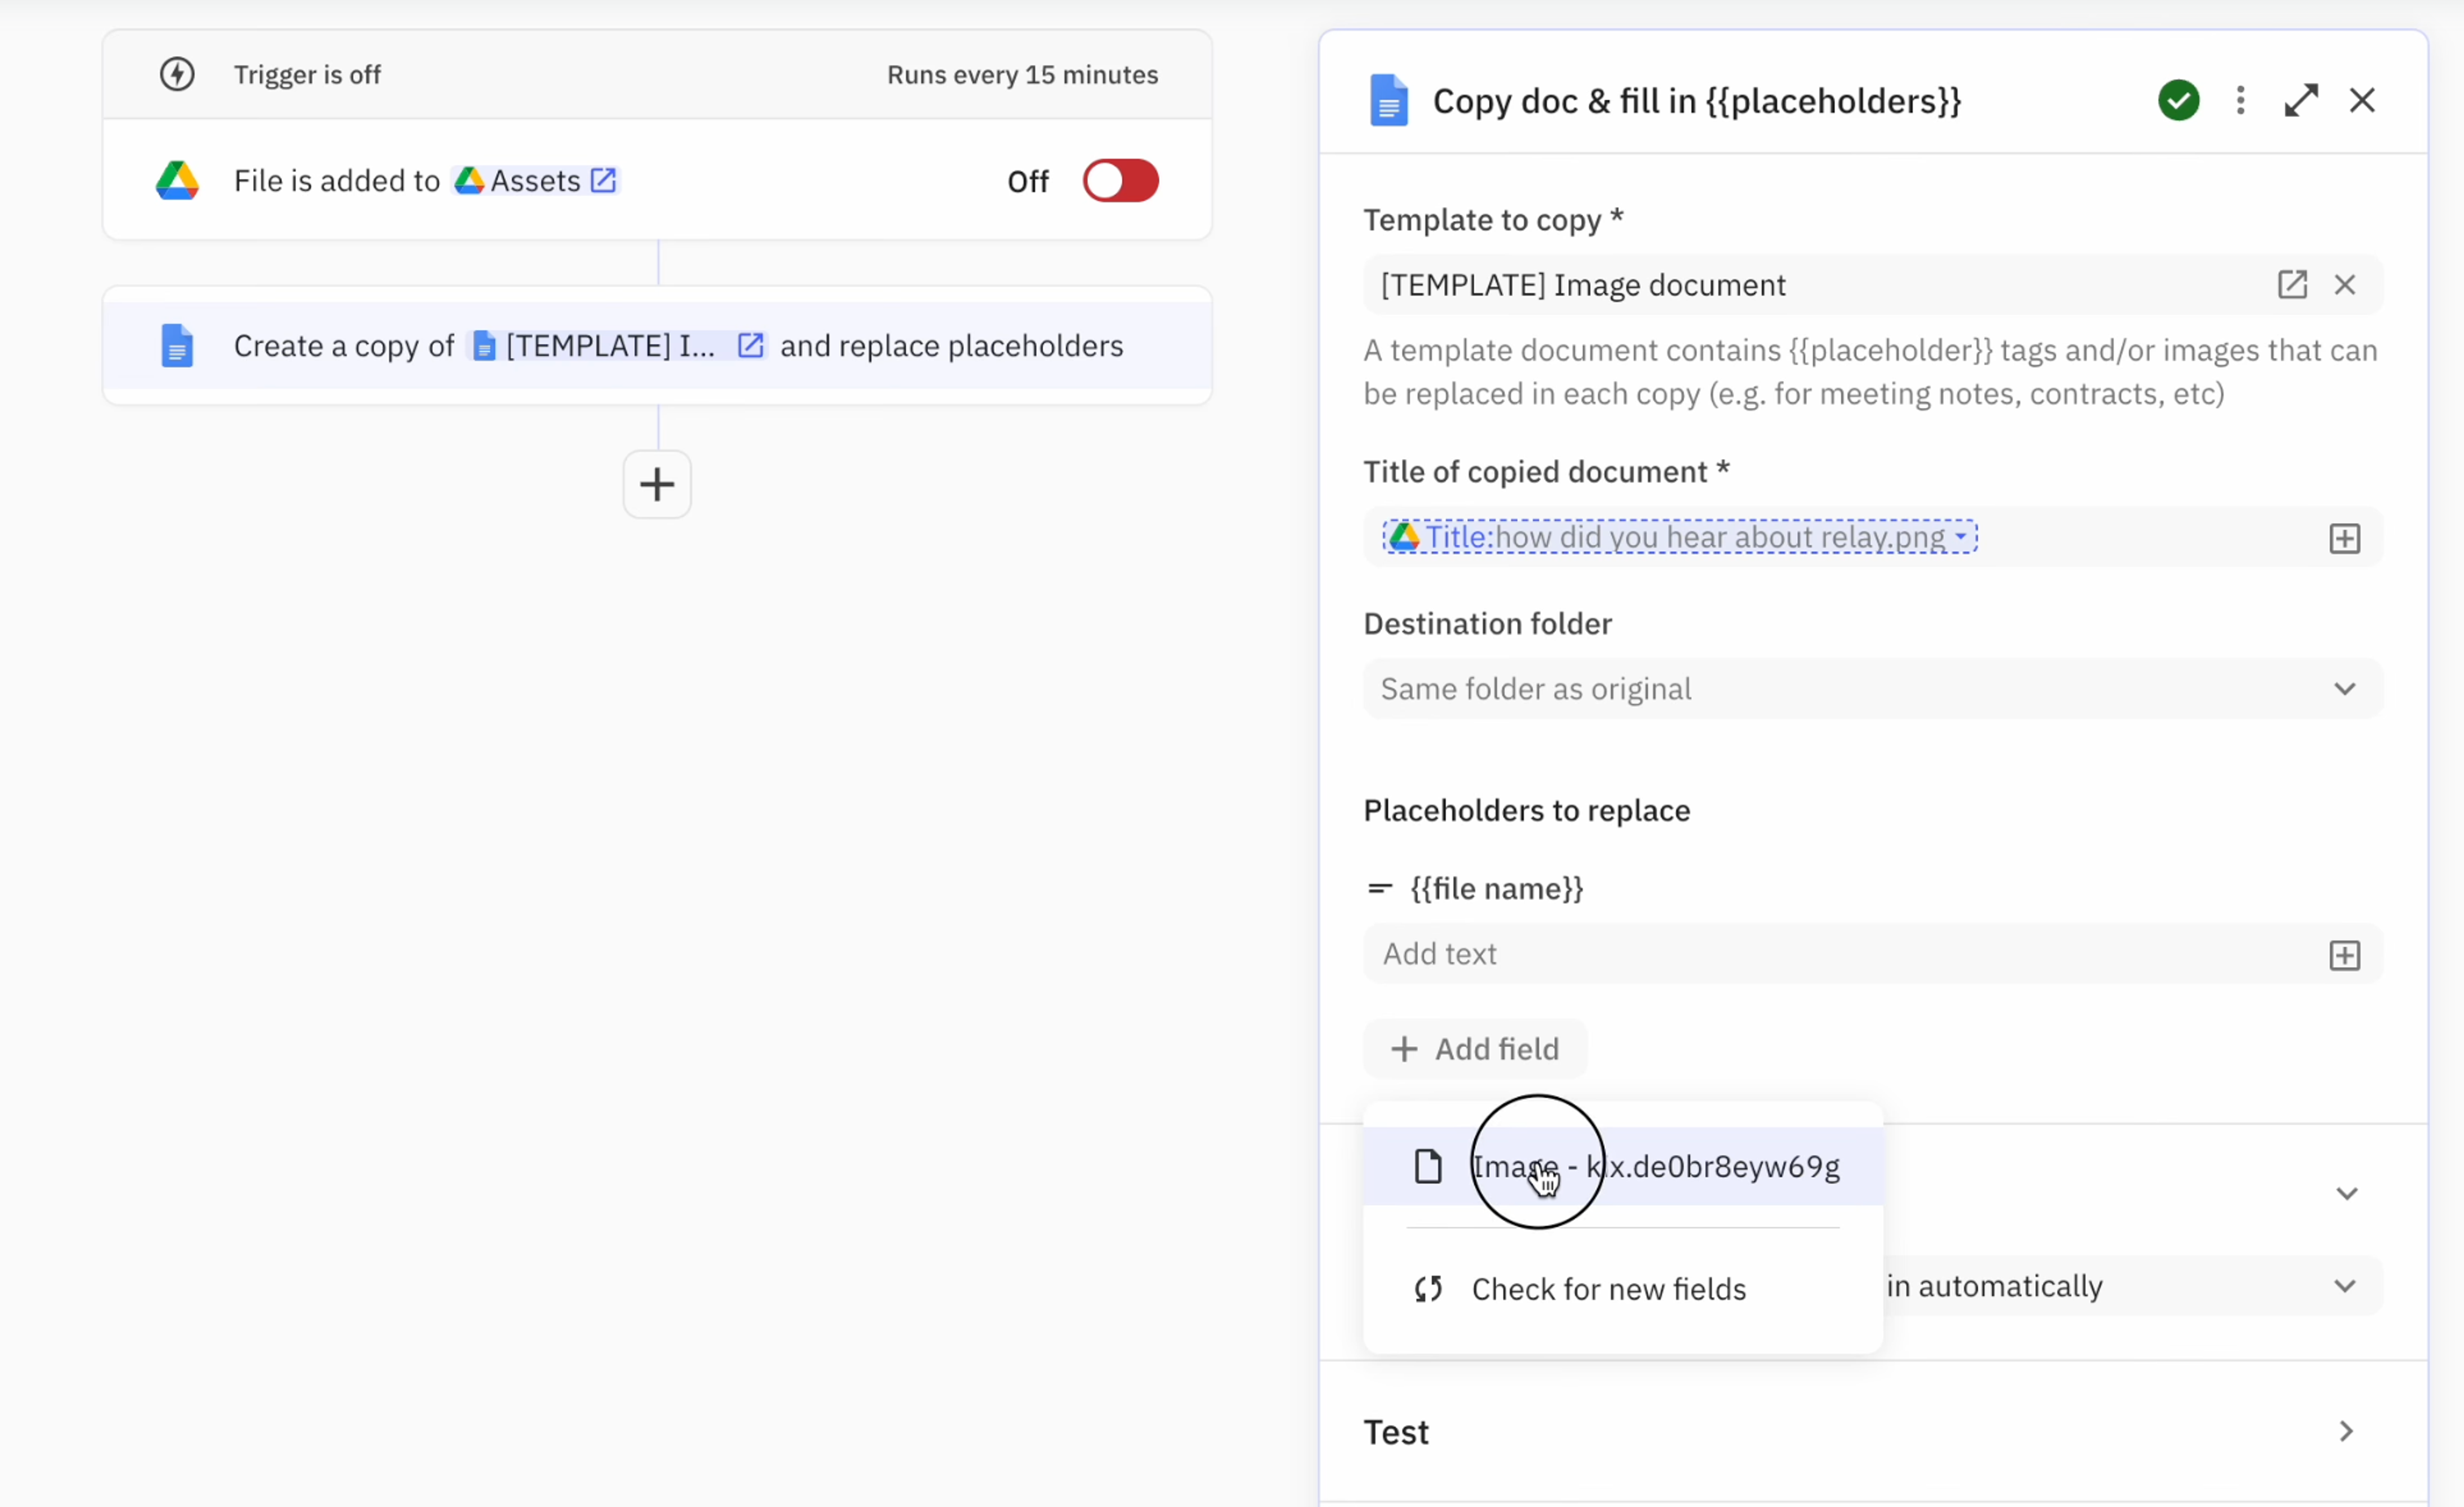
Configuring this action involves a few key decisions:
- Template Selection: Choose the template document you created earlier in the "Template to copy" picker.
- Naming Pattern: Define how the newly created documents will be named. Incorporate variable fields like dates or timestamps to differentiate each document. For instance, you might use the name of the image file added to Google Drive that initiated the playbook.
- Placeholder Selection: Identify all the {{placeholder}} tags and images in your template that you intend to replace with each document copy.
4. Specify new values for placeholder tags and images
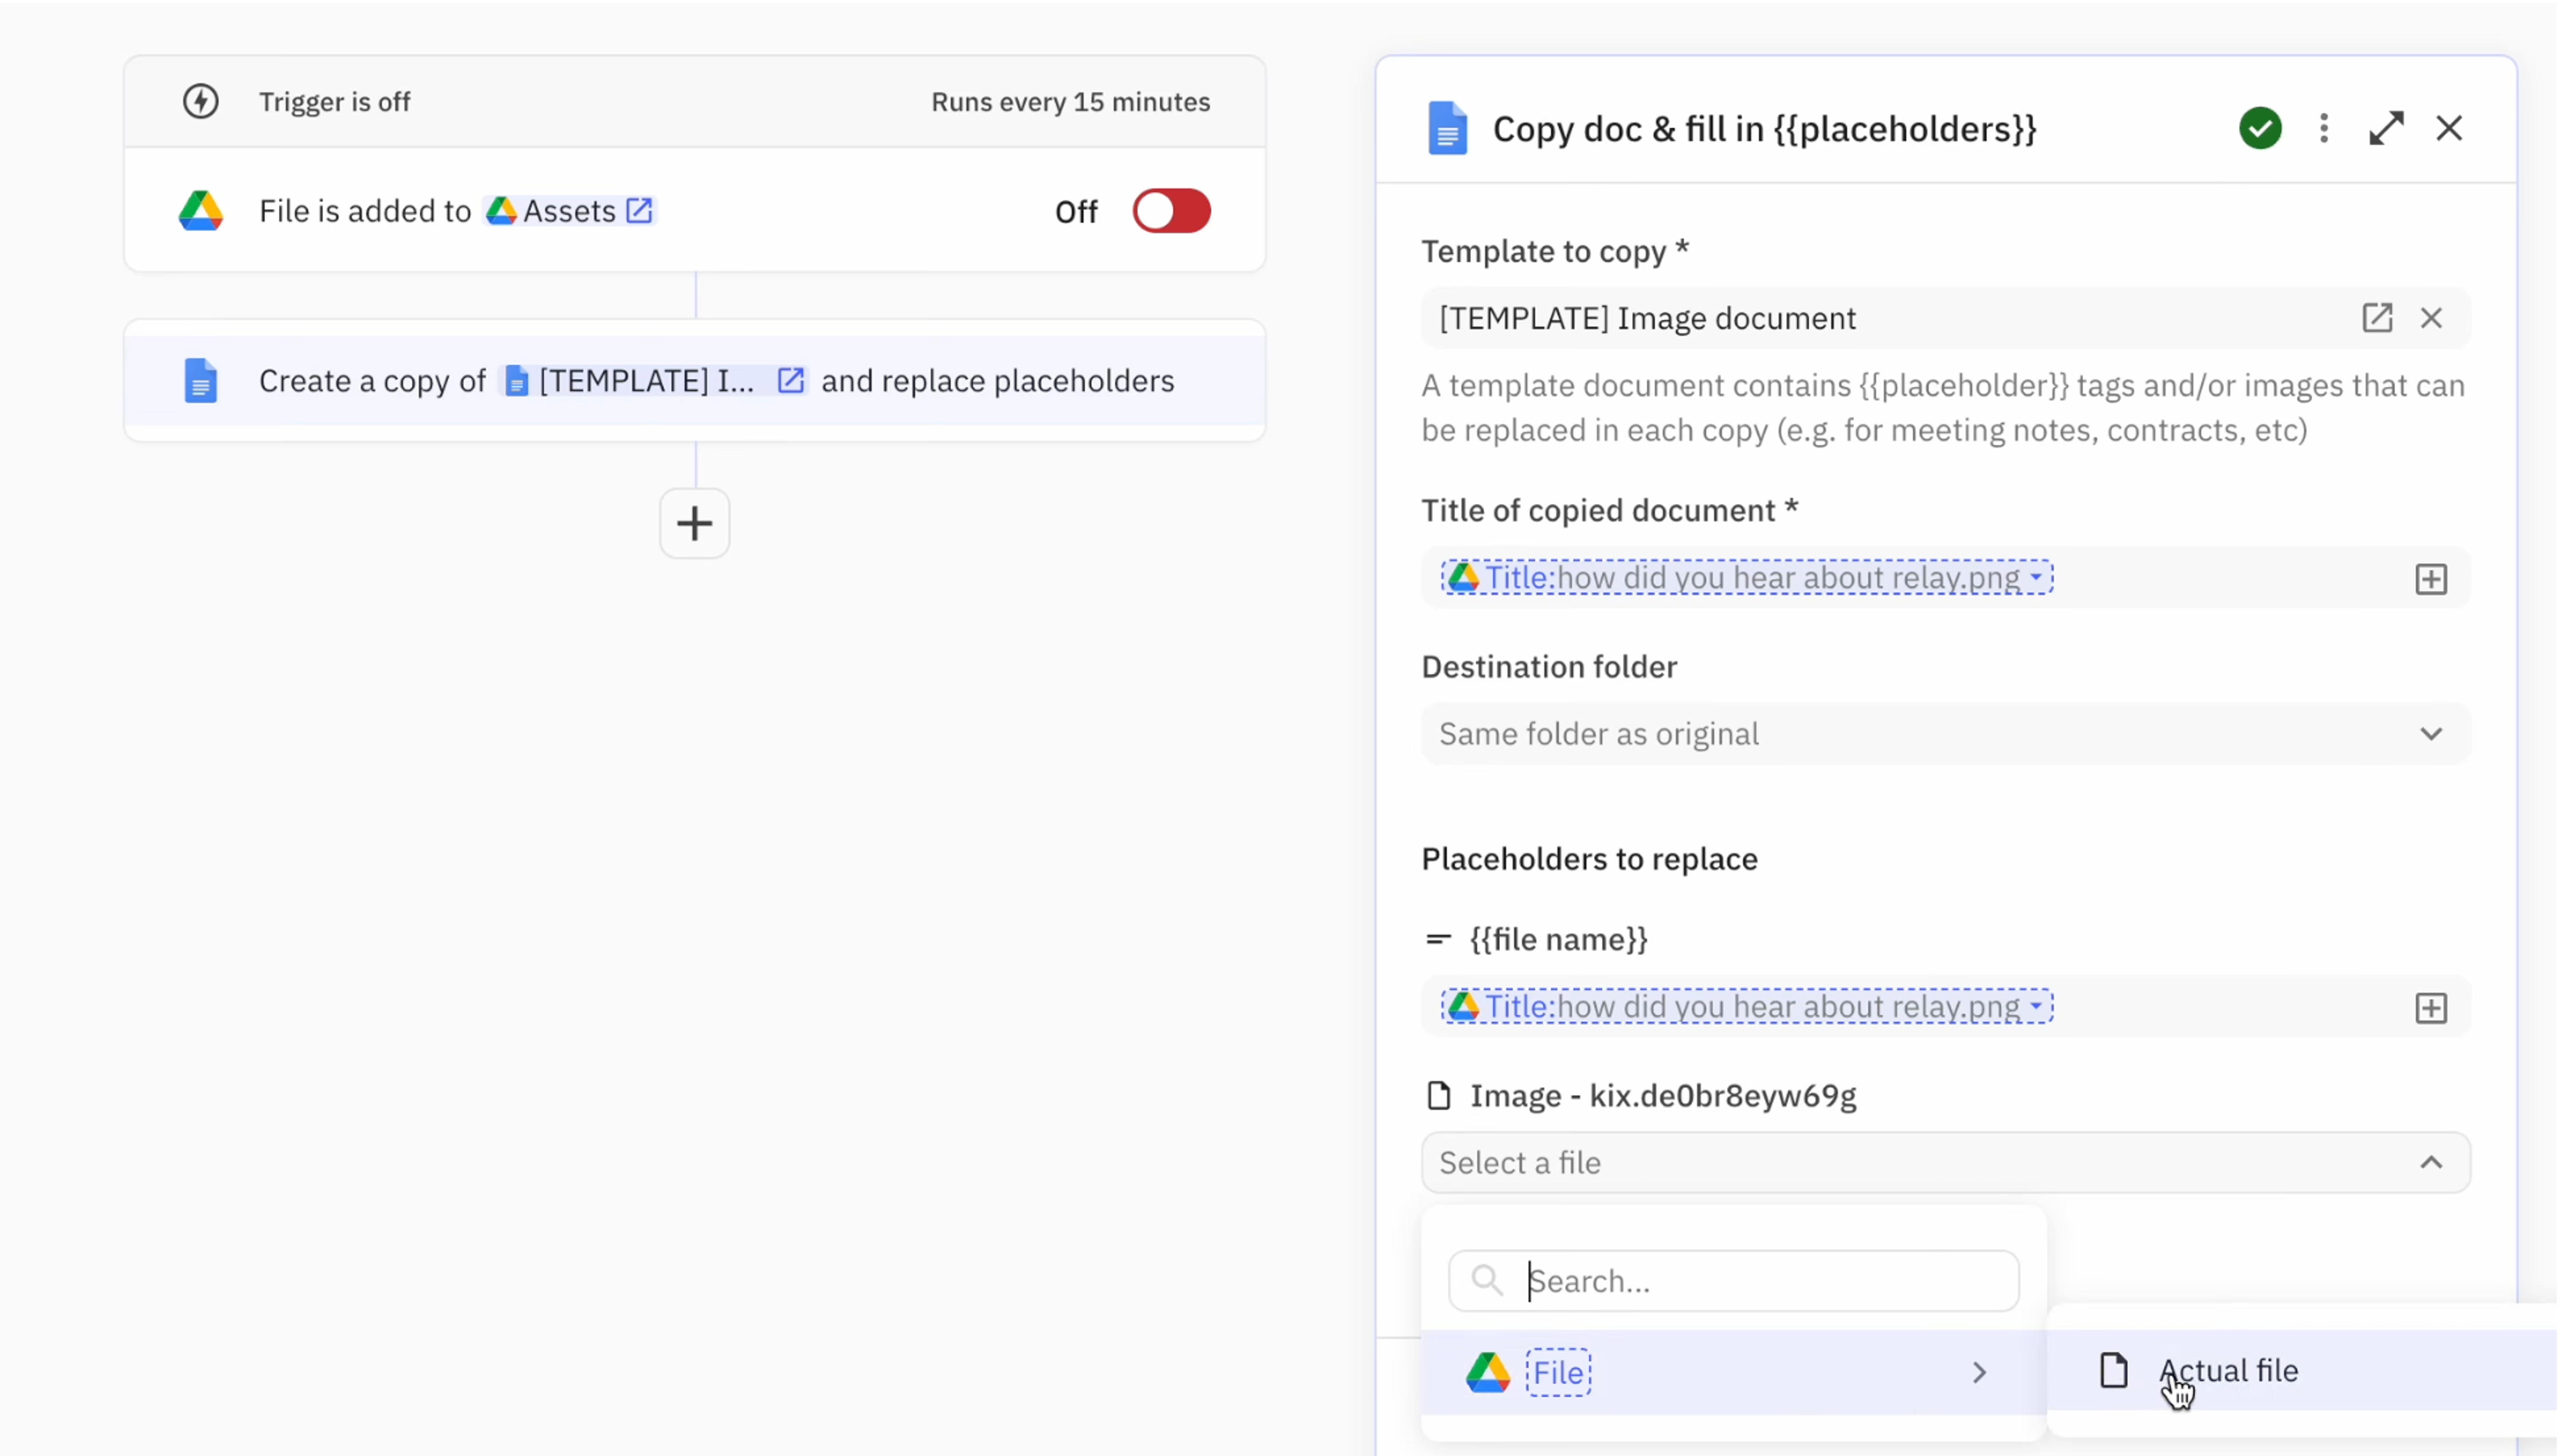
This step involves specifying the new content for each placeholder:
- Text Replacement: Use the title of the newly uploaded image in Google Drive to replace the {{file name}} placeholder within your template.
- Image Replacement: Select the actual file to replace the placeholder image in the document. This file can originate from Google Drive or any other app integrated with your playbook, demonstrating Relay's versatility in handling various data sources.
5. Export the Google Doc to PDF or XLSX (Microsoft Word)
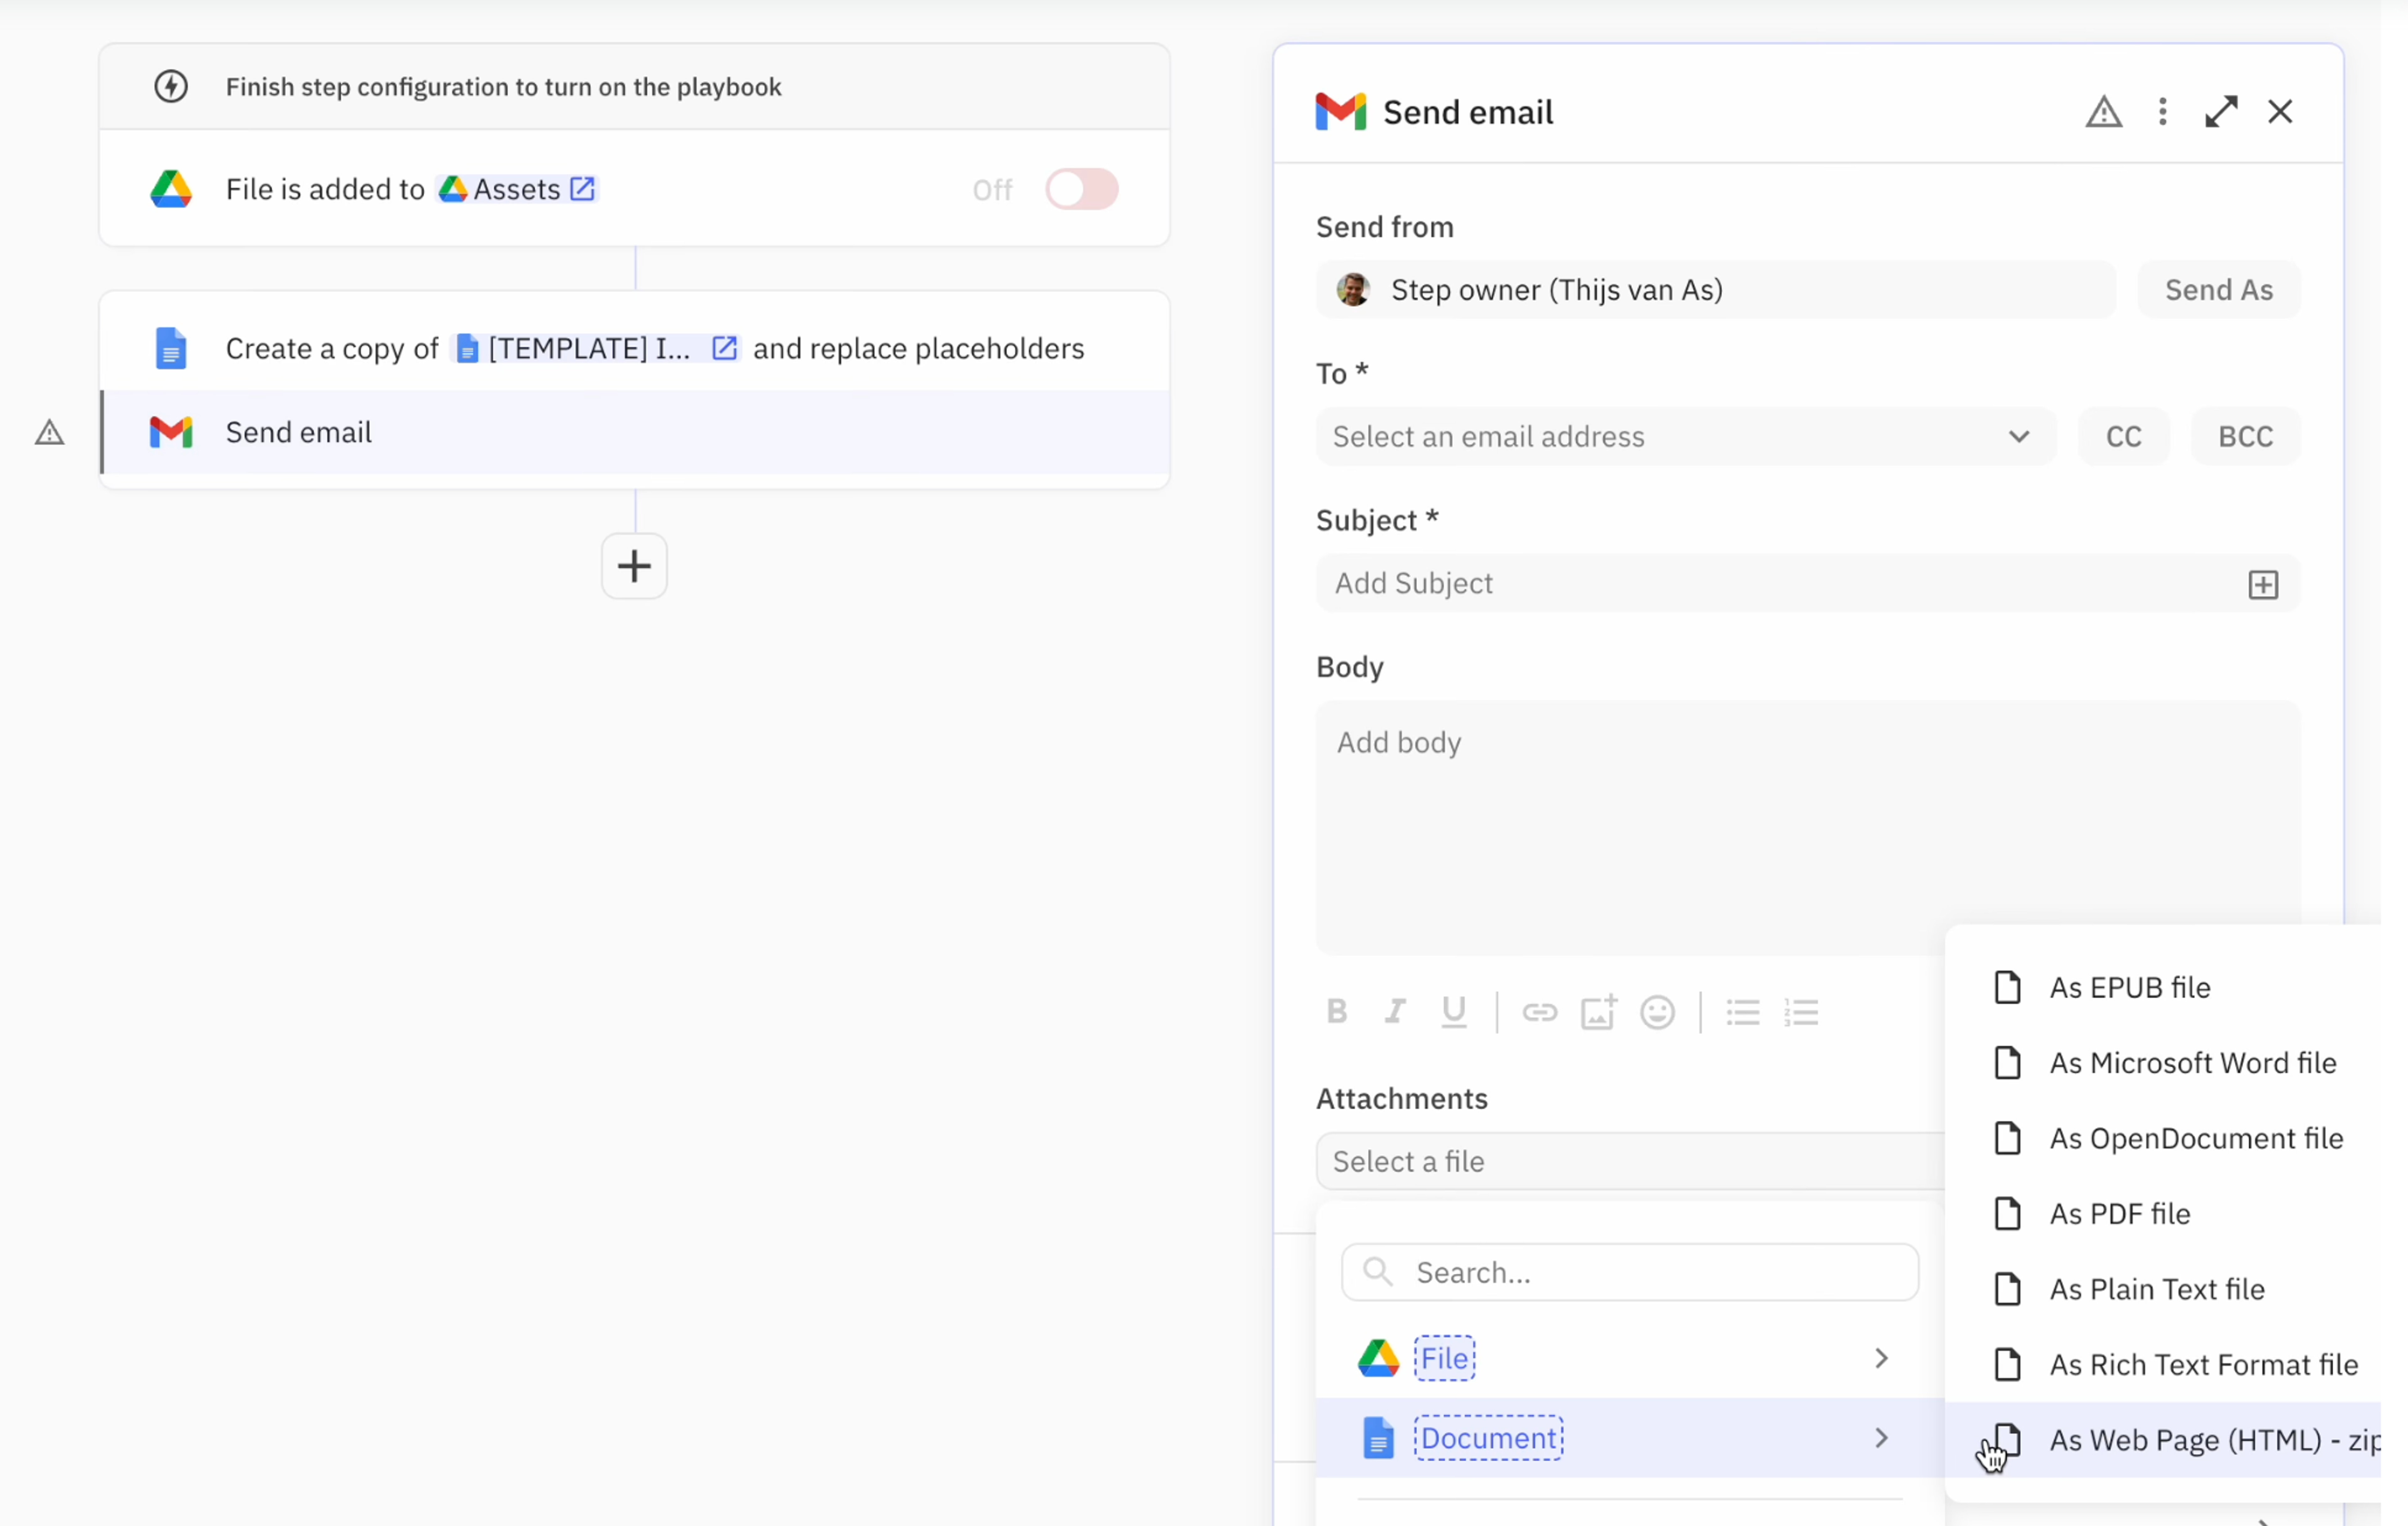
Finally, Relay allows for the easy export of the customized Google Document into multiple formats, catering to different needs or preferences:
- Format Selection: Choose from a variety of export formats such as PDF, XLSX (Microsoft Word), HTML, and even EPUB, depending on your requirements.
- Automation Integration: Integrate this step into any part of your automation workflow. For example, attaching the exported document to an email sent via Gmail. This flexibility ensures that the final output of your document automation process aligns with your specific needs or distribution channels.
Over to you
By following these detailed steps, you can leverage Relay to automate the creation and customization of document templates, including the dynamic replacement of text and images.
Relay's intuitive platform streamlines document automation, saving time and enhancing efficiency in your workflows. Start with Relay.app today and transform your document management strategy.